
Getting Started
Fill in a contact record properly
What this does
The contact record is where a customer's addresses, payment terms, pricelist and history all live. Every quotation, delivery and invoice reads from it, so ten minutes here saves an argument later.
Steps
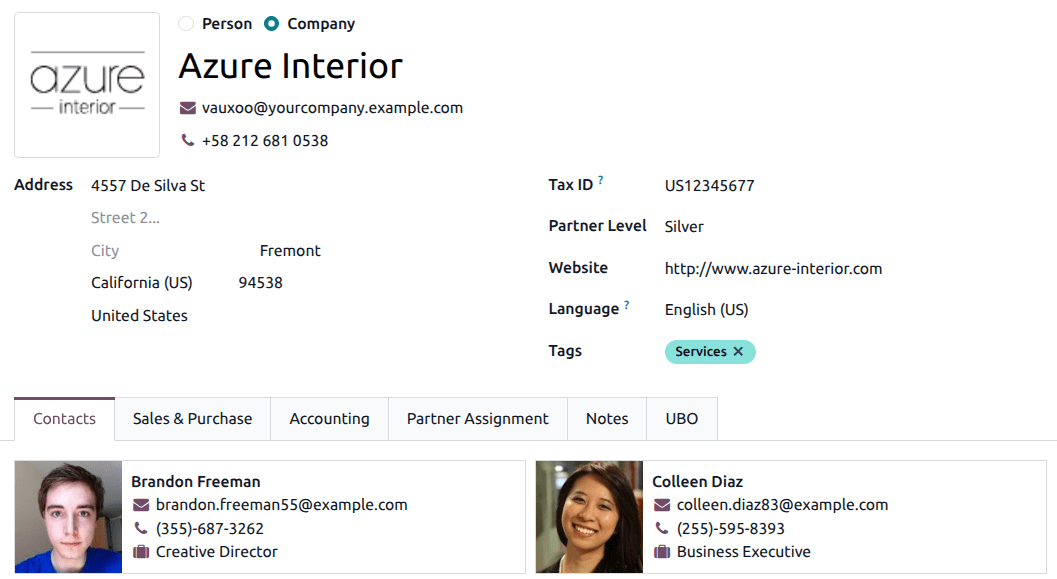
A Person can be linked to a Company through the Company field, which is what makes the company's contact list, statements and follow-ups hang together.
-
01
Open the Contacts app and click New.
-
02
Choose Person or Company. The name is how this contact appears everywhere else, so write it the way it should appear on an invoice.
-
03
Fill the email with its full domain, and the phone with its country code.
-
04
Enter the address.
-
05
Set the Language — emails and documents for this contact are produced in it.
-
06
Add Tags so the contact can be found and filtered later, and save.
Several addresses on one customer
A site is rarely the billing address. On the Contacts tab, click Add Contact and pick what kind of address you are adding:
- Contact — another person at the company.
- Invoice — where the invoice must go.
- Delivery — where the goods are delivered.
- Other — anything else.
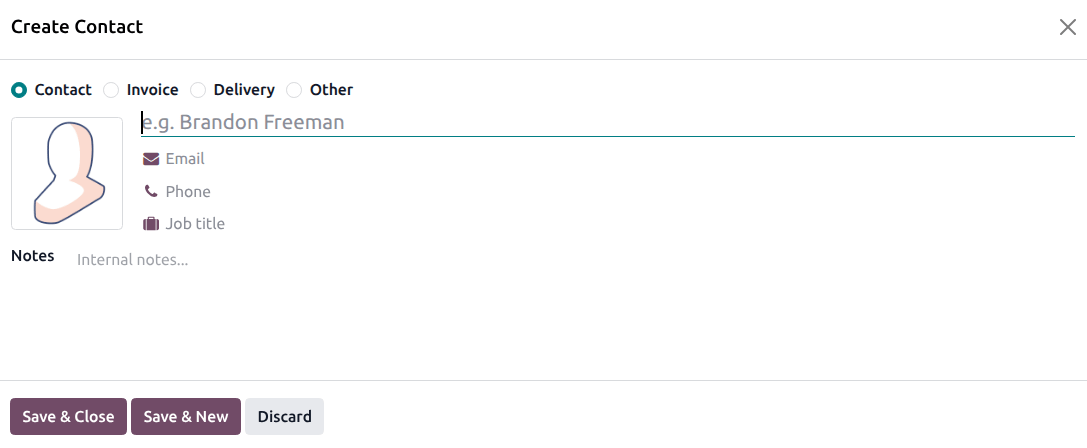
Save with Save & Close, or Save & New to add the next address straight away.
The tabs that matter
- Sales & Purchases — salesperson, payment terms, pricelist, delivery method, fiscal position; on the purchase side, the buyer and supplier currency.
- Accounting — bank accounts, default accounts, and the follow-up reminders for overdue payments.
- Internal Notes — anything your team should know and the customer should not see.
- Misc — company ID, reference, industry, and the Company field that restricts this contact to one company in a multi-company database.
Which tabs appear depends on the apps installed.
Smart buttons
The buttons across the top of the form are the contact's history: opportunities, quotations, invoices, deliveries, tasks, and more behind the More menu. They are the fastest way to answer "what is going on with this customer?".
Archive instead of deleting
- Open the contact.
- Click the ⚙ (Actions) menu and choose Archive.
- Confirm.
The contact leaves the list but keeps its history, and the Archived filter finds it again. Unarchive from the same menu brings it back.
Common mistakes
- Typing the site address over the billing address instead of adding a delivery address — the invoice then goes to the site.
- Creating a second contact because the first could not be found. Search by phone, email or tag before clicking New.
- Leaving the language empty for a customer who reads Arabic, then wondering why the quotation arrived in English.
Was this article helpful?
Thanks — your feedback helps.
Running a window or door factory?
Ask for a demo