
تعبئة بطاقة جهة الاتصال بشكل صحيح
دمج جهات الاتصال المكررة
What this does
Folds duplicate contacts into one record without losing their documents, so a customer stops appearing three times and being chased by two salespeople.
Before you start
- Merging cannot be undone. Open each record first and be certain they are the same party.
- Two companies with similar names are not duplicates. Check the tax ID before merging anything with accounting history.
Steps
-
01
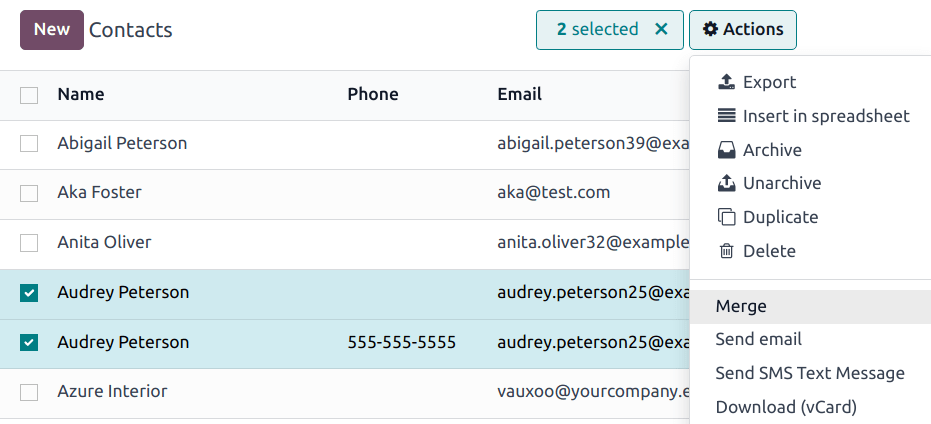
Open the Contacts app and switch to the ☰ (list) view.
-
02
Tick the checkbox of each duplicate.
-
03
Click the ⚙ (Actions) icon and choose Merge.
-
04
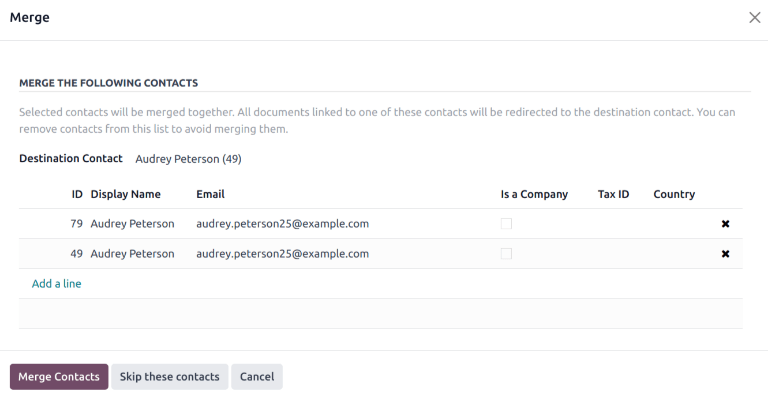
Review the list in the dialog. Remove anything that does not belong with the 🗑 (delete) icon at the right of its row.
-
05
Set the Destination Contact — the record that survives. It defaults to the oldest one.
-
06
Click Merge Contacts.
Find the rest of the duplicates
The confirmation offers Deduplicate the other Contacts, which hunts for duplicates across the whole database. Choose the fields that define a duplicate for you — Email, Name, Is Company, VAT, Parent Company — remembering that selecting several means a record must match all of them.
You can also exclude candidates that have a user account or accounting entries attached. Then pick Merge with Manual Check to approve each pair yourself, or one of the automatic options.
Common mistakes
- Running an automatic deduplication on name alone. Two different people share a name more often than you think.
- Choosing the newer record as the destination and losing the reference the accounts team has been using for years.
- Merging a company into one of its own child contacts.
هل كان هذا المقال مفيداً؟
شكراً — ملاحظتك تساعدنا.
تدير مصنع نوافذ أو أبواب؟
اطلب عرضاً تجريبياً